Getting The Most Out Of A MIDI Kit

So you just copped a Producergrind MIDI kit 👍 You’re hyped because these MIDI will really help you with creating dope melodies. At the same time, you don't want to end up with the same melodies as everyone else 🤔
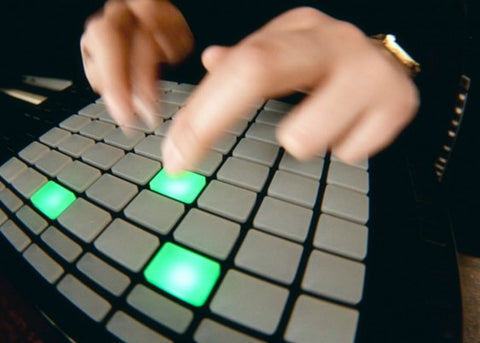
Here's a clip from TWiLL's MIDIGRAM MIDI Melody Collection after assigning it some instruments:
There’s nothing wrong with dragging a MIDI clip onto your DAW, throwing on a instrument preset, putting drums on top, and calling it a day. But if you really want to be creative with premade compositions and patterns, here are seven quick tips for how to get the most out of a MIDI kit:
Tip #1: Transpose Your MIDI
Just as you would pitch a .wav sample up or down a few semitones to match the key you're writing in, you can transpose MIDI notes into literally any key you want.
Since MIDI is simply data input, transposing a MIDI clip is 100% more flexible than audio could ever be.
Even the most high quality audio file has a threshold for how far you can pitch it up or down, but MIDI can play any note you want.
It's only your VST instrument that may impose a limitation (some instruments only play within a certain range on the keyboard).
BEFORE

Since the intervals won’t change if you select and transpose all the notes together, your MIDI will still retain the original composition and rhythm. The key will just be different; the pitch higher or lower.
This could be all you need to get inspired 💡
Sometimes a little transposition in your samples is all you need to take your beats from mediocre to HARD 💎 🔥
Transposing MIDI is quick and easy to do, no matter what DAW you’re using.
Listen to how this MIDI sounds pitched up three semitones:
Tip #2: Adjust The Bass Notes In Your MIDI
Bass notes (the lowest notes within a chord progression), are another thing you can switch up in your MIDI clips 👍
Adjusting the bassline is an easy way to drastically change the direction and tone of a chord progression 🔥🔥
Originally, the bass notes in this progression were only alternating between A and E. Now they’re starting on C# and then using B, A, F#, and D.

Listen to how this MIDI sounds with adjusted bass notes:
Tip #3: Change The Timing And Rhythm
A lot of producers sleep on this technique because they think that rhythm is only created by the drums in a beat…any instrumentalist will tell you that this couldn’t be more wrong!
While of course rhythm is further developed as a result of drum programming, drum patterns in most Hip Hop, Trap, and RnB beats are heavily influenced by the melody and chord progression they are sitting on 🙌
The original rhythm in TWILL's MIDI clip is hard, but it might not fit perfectly with the rhythmic content in the rest of a beat. Fortunately for us, MIDI is super easy to adjust.
Listen to how this MIDI sounds after adjusting the time placement of a few notes and creating a different rhythm:
Tip #4: Tear Up That Sheet Music
If making dope melodies isn’t your strength then premade MIDI melodies are perfect for you.
Beyond the fact that MIDI clips can generally be assumed to be royalty-free, there's no shame in using MIDI kits as a starting point. After all, they're designed to be a quick and easy way to get some ideas down!
Next time you have your DAW open with no immediate ideas, drag in a MIDI clip and begin changing up individual notes 👍

MIDI is often a piano player's dream. It's like looking at a piece of sheet music, only you have complete freedom to change up the notes and timing to create anything you want 🎹
You can turn minor chords into major, or make simple melodies bouncier and more complex 💎💎
Who doesn’t like to have 100% creative control while making beats?
Listen to how this MIDI sounds after changing up the original composition:
Tip #5: Slow It Down With Halftime Or Grossbeat
Applying plugins like Halftime or Grossbeat to your melody MIDI can add a completely different atmosphere and feel to your beat 🤯
If your melody sounds too low-pitched once halftime is applied to it, you can easily just transpose the notes up 12 semitones (one whole octave). This way the pitch of your melody will remain the same, but it will be playing at half speed.

BONUS TIP: Try applying Halftime to your MIDI in certain sections, like the intro or verse 💣
Listen to how this MIDI sounds with Halftime:
By the way, I’m using Addictive Keys for the piano melody in this!
Tip #6: Utilize Internal MIDI Functions Like The Arpeggiator
Most DAWs have built-in MIDI manipulation effects such as an arpeggiator or randomizer.
In FL Studio the arpeggiator can be accessed via the keyboard shortcut control+a on Windows and command+a on Mac.

Before you can understand what an arpeggiator does, you first must understand what a chord is. A chord is three or more notes played together at once to form harmony or dissonance.
So what is an arpeggio? An arpeggio is basically a broken chord. It's a chord whose notes are played one after the other, instead of all together at once.

Take C major, for example. Instead of playing C, E, and G together, you would play those notes one after the other going up or down (the order actually doesn't matter; any sequence qualifies as an arp) 🎹
Luckily for producers, it’s really easy to arpeggiate your chord progressions and MIDI within your DAW using an arpeggiator.
Arpeggiators are super dope because they give you A LOT of options to cookup something crazy 💯
For this MIDI, the first thing we do is change the timing of the original main melody to create a of pattern of repeating ½ notes.

It isn't always necessary to prep a MIDI clip like this. You'd only do so if you're having a difficult time getting a good result from the arpeggiator.
Next, we open the arpeggiator and adjust a few knobs like the range (which determines how many octaves will be affected) and the time multiplication (which stretches the time of the pattern notes by integer amounts) 🤯🤯

MIDI + Arpeggiator = cheat code to get out of beat-block!! 💎
You may want to adjust other instrumentation to compliment what the arpeggiator is doing:
Tip #7: Freestyle It Using All Of These Techniques
You never want to limit yourself while producing, because you never know which technique will take your beat to the next level.
Flexibility and a quick workflow come from harnessing the techniques available to you at the right time ✅

If you’re a beginner producer, then commit yourself to learning techniques 1-6. Once you’re comfortable with each of them, you'll naturally begin freestyling!
Listen to how this MIDI sounds with all of these techniques applied:
---
There’s no right or wrong way to use a MIDI kit. MIDI is one of the most flexible file formats out there and it's used universally in every DAW. It's well worth your time to master its use!
These techniques are a great place to start for getting the most out of premium MIDI kits, but totally apply to your own original MIDI as well 👍 Checkout TWiLL's MIDIGRAM MIDI Melody Collection for 200+ Royalty-Free Premium MIDI.


